
Agenda
Aegis developers are sharing this tutorial with global IT development community to help them in Pentaho BI Analytics Services and Data Integration tool and technique. Before starting the project, you need to download
I assume you already have downloaded
(for me this is the latest version).
Extract the Zip file and move extracted folder to
Use below command to move folder
Now move to the folder data-integration and run below command.
This is your first perspective main screen of the tool.
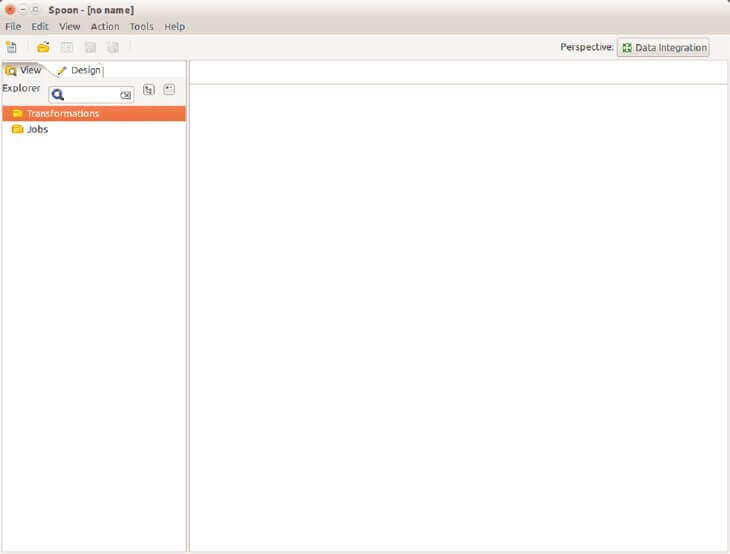
You can see the Left panel with two options
- 1. Transformation
- 2. Jobs
Get Started with the first step for data integration, lets have a hands on example of MySql datatable to Text file data integration.
- 1) Goto File >> New >> Transformation It created a new transformation canvas for me
On left side you are having Database connection and Partition schemas and on and on... few things are basics and few things are very advance, we will get to know in further studies.
Now Go to Design Tab beside View, and here you can see all these folders Input⁄Output and so many.
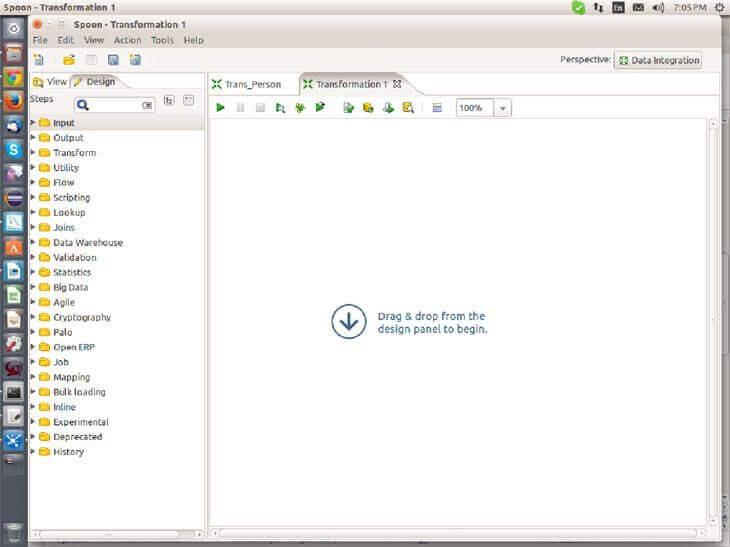
- 2) Input and Output Source you can use as and when as required.
In this tutorial we will learn basically how to get used to this component, what is the basic style to use input⁄output source.
- First Save the transformation (create one separate folder for all the transformation to be placed).
- Expand Input and Take the table Input from the left menu and drag this on the right side transformation page.
- So you have taken this component what this component will do? It will connect to the database and help you to the feedback from database table.
Also you can write yout own SQL custome queries inside it.
Lets start >> Double click on it
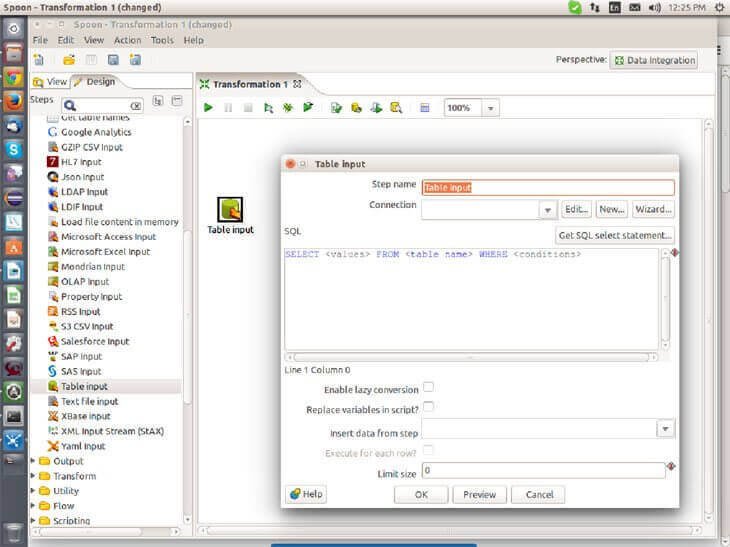
- 1) First field will be the Step name, you should provide the step name any name to identify this step.
- 2) Then there will be the connection field, as of now there is no connection configured so just click on new.
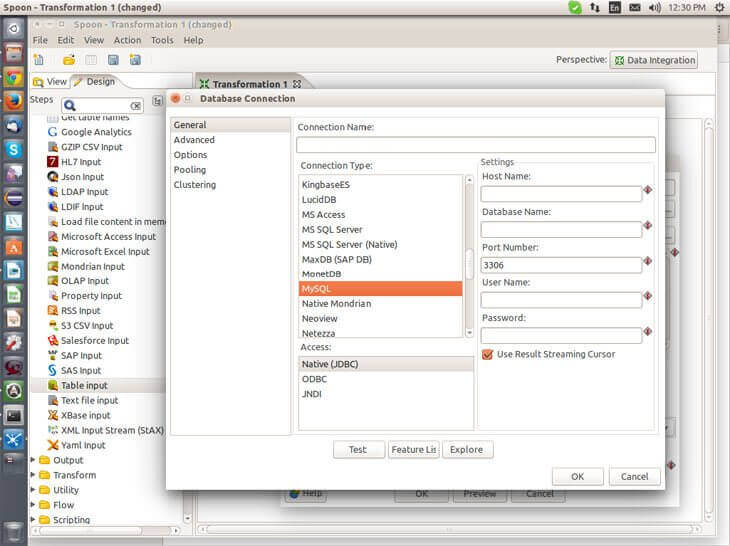
- 3) You can see the dialog to configure many database, as we are using mysql select mysql and its required fields.
(But before that you should have the library (JAR) file to establish a connection with your database. So first go the data-integration folder data-integration⁄lib⁄ and check for the particular jar, if it is not available then add it. I assume it will not have JAR to connect with mysql so add mysql-connector-java-5.1.34.jar and restart the tool.)
Then visit us to get awareness of using the business intelligence tool called Pentaho which simplifies the tasks and is capable of improving the business efficiency and performance.
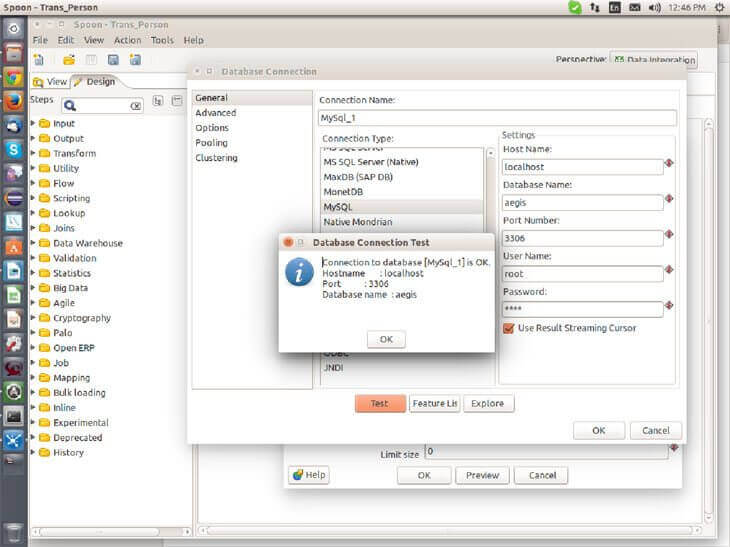
- 4) Once restarted fill up the required fields and test the connection.
- 5) Now go to the back window, and you are ready to write a query. A query can be anything select query or join query whatever your database supports. Here I will explain you how to write an automated query.
- 6) click on Get SQL statement button, It will open the dialog with connections expand the connections and select particular table out of it.
- It will ask you to include a field name to the query select YES, and you can see the generated query in SQL query BOX.
- 7) Now click on preview to review the data, confirm and close it. Your Table Input is now ready to reading a data from database.
Now what I want to do is, read the data from database table and save it to the text file.
Configure an Output source.
- 1) Select Text File Output from Out folder and drag it to the transformation page.
- 2) Keep your Mouse over the Table Input Icon and it will show some ICONS having an Arrow (Right side arrow).
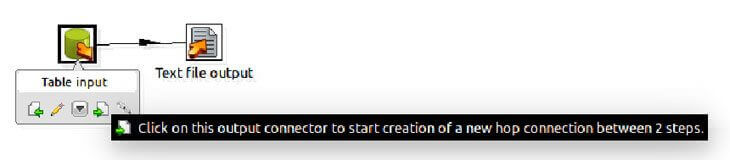
Click on that output arrow and place your mouse to the Text file output icon move it till it changes the color of a line and establish connection between Table input and Text file Output.
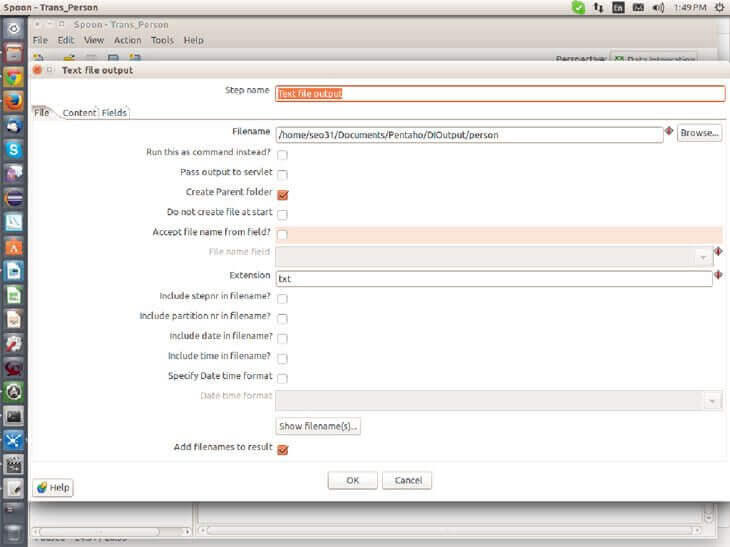
- 3) Double Click on text file output it displayed one dialog with some fields and Tabs.
- 4) Go to File Tab and fill up the file name field (brows and move to the path to store the output file).
- 6) Go to the Content Tab, here we need to specify how the data will be in text file. Specify the fields like separator as required
- 7) Go to Fields Tab and click on Get Fields.
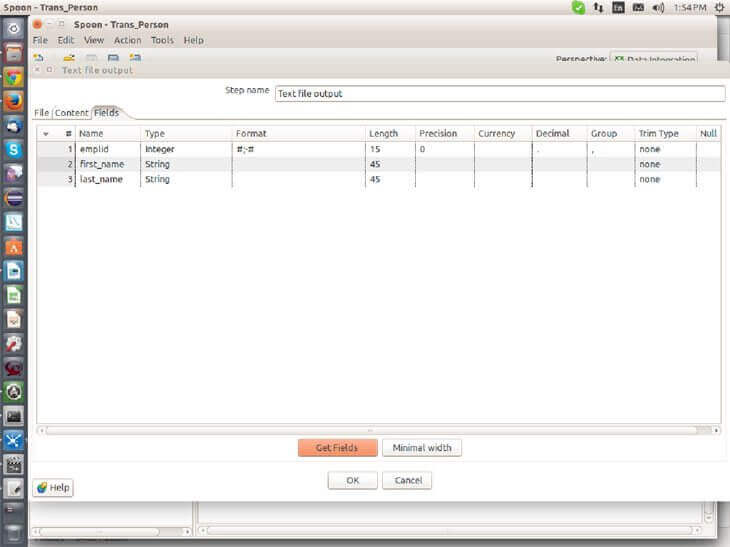
Now you got the fields and then click on OK, and save the transformation again.
Thats It, you can now RUN the transformation by clicking PLAY button on the top.
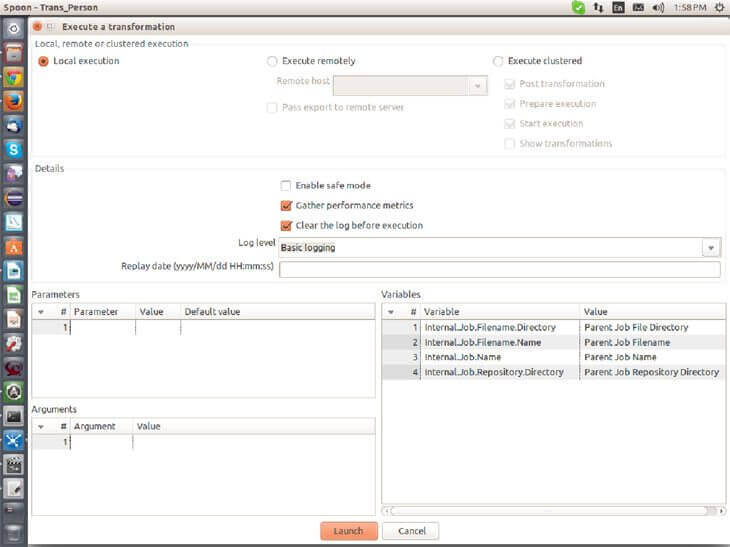
Click on LAUNCH and it will execute the transaction.
You should see the execution result like this.

DONE. Go and check your output file with table data.
Conclusion
We hope this tutorial has made you clear how to use pentaho data integration tool. You can feedback this story while commenting below. You can also make queries related to Pentaho development and our experts will reply to them soon.
For further information, mail us at [email protected]