

Introduction
In this article will have look on how to deploy ASP.NET MVC application to Azure Cloud Service using Visual Studio 2026. Also will have quick look on how to connect the underlined Azure Virtual Machine, our application deployed into.
Prerequisites
- Microsoft Azure Subscription
- Visual Studio 2015 or later version with Azure SDK installed. Good if its Visual Studio 2017.
Quick Overview
Azure Cloud service is the very first Platform as a service offering from Microsoft Azure to deploy web apps. Though it’s very much similar to Azure web apps, but has some key differentiating factors too. And the most basic and important difference to learn about is, in Azure cloud service user has an access to underlined Azure VM or VMs but in Azure web app user doesn’t have access or control over Azure VMs. These are those Azure VMs where our web application will be deployed.
Azure Cloud service makes it possible to deploy background services very much similar to Windows services to Azure VMs, and referred as Worker Roles. Also, web application can be hosted through IIS & deployed to Azure VMs, and its referred as Web roles. Activity like initializing the servers, windows related Updates till deployment is taken care by Azure.
Though important point to be taken care is, deployment in Azure Cloud service is comparatively slower than Azure Web Apps. Also, deployment slots or swapping the environment is not free in Azure Cloud service. You can watch and learn here how to deploy ASP.NET MVC application to Azure Web app using Visual Studio 2017 v15.3 Now let’s learn step by step how to deploy ASP.NET MVC application to Azure Cloud service.
Create Azure Cloud Service using Visual Studio 2026
Step 1: Open File => New => Project
Select Cloud under Visual C# => Select Azure Cloud Service Template, project for creating a scalable service running on Microsoft Azure.
Name the project and Click OK. Here in this article I have named it as MVConAzureCloudService.
Create ASP.NET MVC application.
Step 2: You can select multiple project from this window, by selecting any web or worker role listed for both C# and VB as programming language, under the Cloud service solution.
But for this article we need to deploy ASP.NET MVC application. Select ASP.NET Web Role and Click on OK.
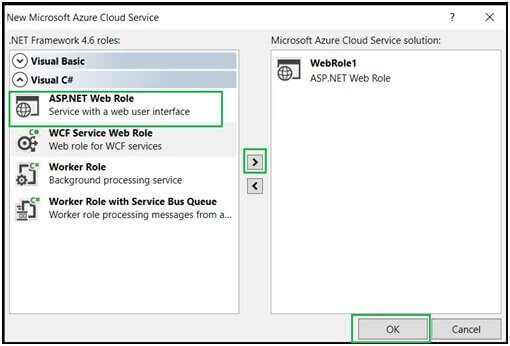
Step 3: Select MVC from listed options. And Click on OK. Make sure checkbox for folders and core references of MVC is checked.

ASP.NET MVC project is created with name WebRole1 under Azure Cloud service solution.
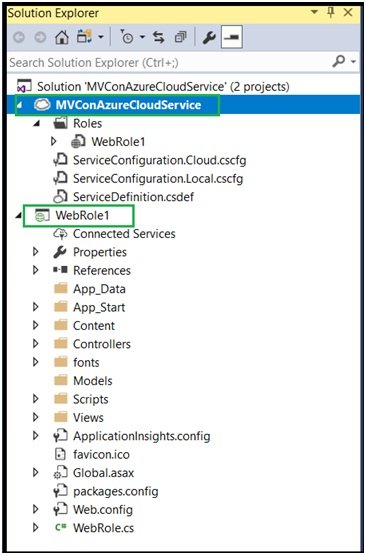
Step 4: Build the solution, not required as such but as a good development practice. And Run it. I modified file with changing display name from ‘Application Name’ as ‘MVC on Azure Cloud Service’ in menu.
Tip: Make WebRole1 i.e. MVC Application as Startup project before running.
Deploying the application to Azure Cloud Service.
Step 5: Open Solution Explorer => Right Click on Azure Cloud project => Click Publish
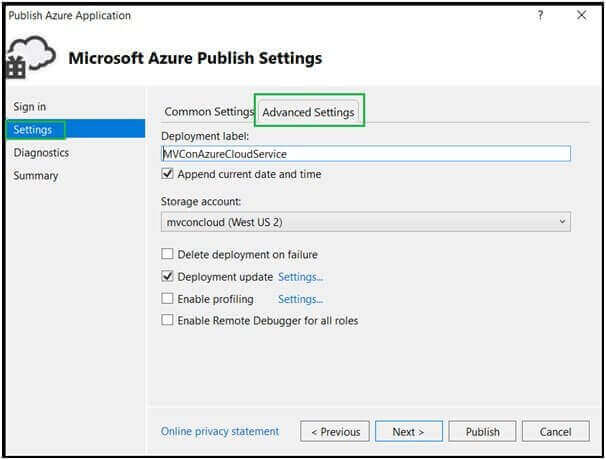
This will open up Publish window with four tabs,
a) Sign In: Wherein you have to login with your Microsoft Azure Subscription account. This will validate, fetch and list your subscription. Once done, click on Next.
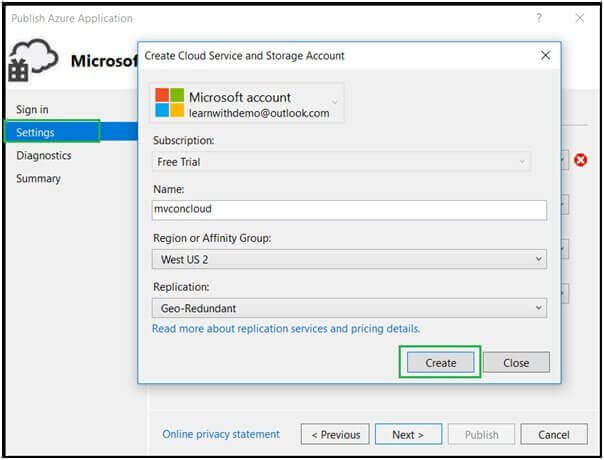
b) Settings: Wherein you have to provide unique name for your application. This name will be added to Azure Cloud service web domain, w <app name>.cloudapp.net , a public cloud URL for your ASP>NET MVC application on Azure Cloud Service. Secondly, you need to select the region, so as to where this service & underlined Azure VM will get deployed. And the last is to set the replication from the available options.
Here, I have provided name as ‘mvconcloud’, at West US 2 as region with Geo-Redundant as replication. Click on Create.
Step 6: Window will come up with following details under common settings, Cloud Service: Service configuration we entered in earlier step i.e. Name, region and replication.
Environment: Lets go with as ‘Production’ as option. ‘Staging’ is another option available.
Build Configuration: Select as Release.
Service Configuration: Select ‘Cloud’ as option. ‘Local’ is another option available.
Now as we need to access our deployed Azure VM, we need to configure login credentials for the same. We can do it right from here itself.
Step 7: Check the option Enable Remote Desktop for all roles. And Remote desktop configuration window will popup.
Fill in all required details like username, password, and click on OK.
This credential will be used for accessing our Azure VM once deployed.
Click on Next to proceed further.
Let’s go as is with Advance setting default options selected. It will also create an Azure Storage account with the same name as we gave for our application. This is required for uploading packages. This package is stored in Azure Storage.
Step 8: Diagnostics tab will allow us to configure Application insights setting.
For this article will go with the default configuration.
Click on Next.
And click on Publish.
Deployment takes fewer minutes. As mentioned earlier it takes more time to get deployed than in Azure Web App.
You can track deployment status along with performing steps under History section at Activity Log.
It will provide the app public URL along with Deployment ID as seen in below image.

Step 10: Once the deployment is completed as highlighted below, will open the URL in browser.
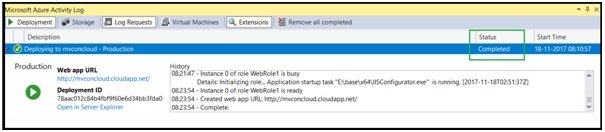
That’s it our ASP.NET MVC application is deployed to Azure Cloud Service and is Live!

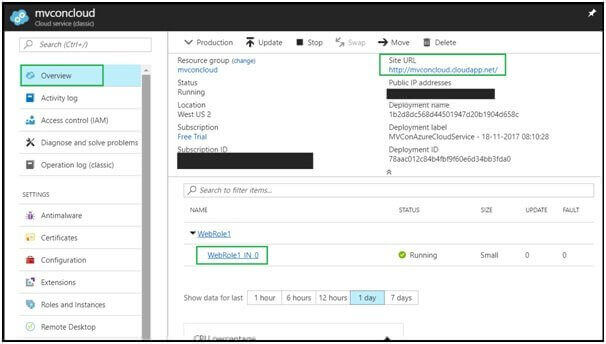
Now let’s go to Microsoft Azure Portal and navigate to all resources section.
Here we can see, it created three resource group for deploying Application Insights, Storage account and Cloud service.

Navigate to Cloud Service Overview section in portal.
Webrole1 can be seen in Running state.
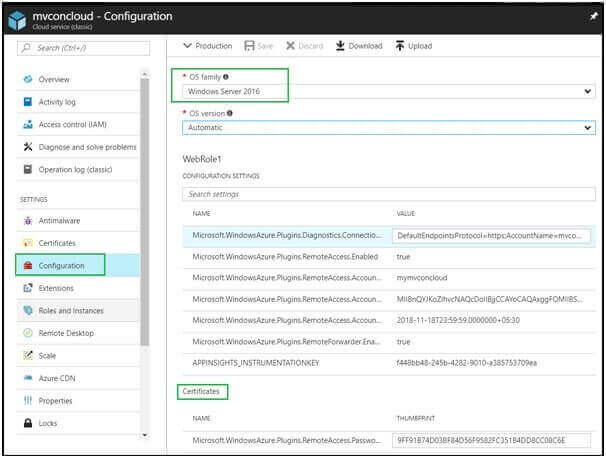
Navigate to Settings => Configuration section to view details about Azure VM.
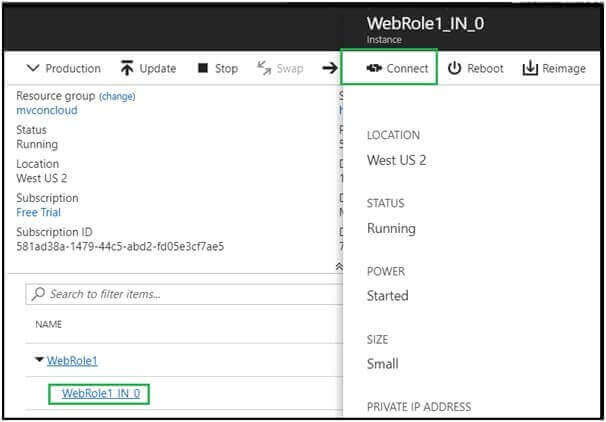
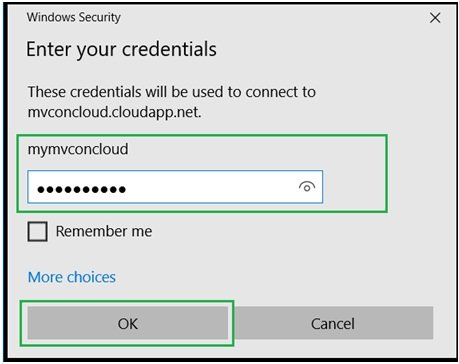
Step 11: Now let’s connect to Azure VM, our application is deployed.
Click on WebRole_IN_0 => Click on Connect highlighted in below image.
Step 12: This will download file with name WebRole1_IN_0.rdp
Open the file and enter details we configured during deployment.
Click on Ok to get connect!
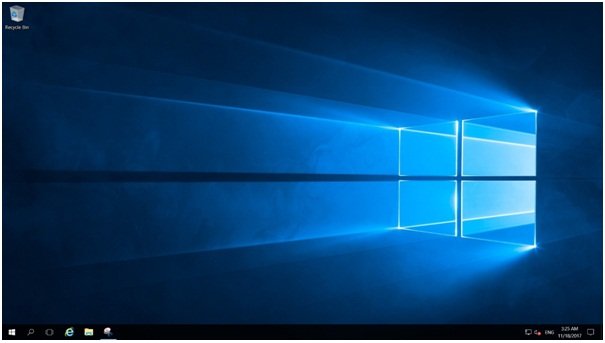
And here we are in to our newly deployed Azure VM
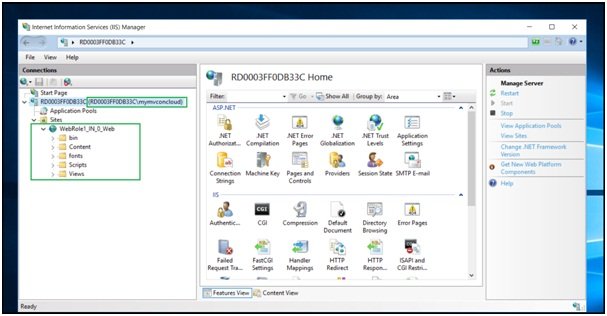
Open up IIS, to view our ASP.NET MVC application.
Summary
Deploying application to Azure Cloud Service is one easiest way to deploy web applications on Cloud. Visual Studio helps in this by allowing to configure minute details for application. Comparatively it takes more time to get deployed than in Azure Web App but accessing & gaining control over underlined Azure VM makes this wait time worth. As an expert Asp.net MVC developers, we would recommend to follow the steps detailed in article and come up with your findings and tips trick if any. Thank You! Happy Azure Coding!
For further information, mail us at [email protected]