

Introduction and Problem

Big Data Hadoop is widely acclimated by companies these days and with an average 50+ nodes cluster and 100+ TB storage used in most of the enterprises there are a huge number of errors and issues faced by Big Data Consulting Company India and Admins every single day. One of the utmost typical and toughest errors faced by them is disk related issues where there is no option left but to replace the disk where Hadoop data is stored and this faulty Disk is needed to be replaced by a new one.
Disk replacement activity in Big Data Hadoop mostly involves a worker/datanode going down/showing bad health due to one of the disk failing for that particular node. Please note that this applies to all the distributions used for Hadoop e.g. Apache, Cloudera, Hortonworks, MapR, IBM, AWS etc.
The Hadoop solution here is to perform Pre Disk Replacement tasks for Hadoop worker nodes to ensure data should not be corrupted/lost, while/post disk replacement.
Hence a typical Disk Replacement activity will involve below major tasks (for a given Big Data Hadoop worker/Data node):
- Pre Disk Replacement Tasks
- Actual Disk Replacement
- Post Disk Replacement Tasks
NOTE: Disk Replacement steps also depend on Disk Raid level. For Disk using Raid 1/10 we can do Hot Swap.
For illustration purposes we have used Cloudera Manager as a Monitoring tool which should be taken as a reference for other monitoring tools too.
At times the disk gets corrupted and has to be replaced with a new one. We provide Hadoop solutions by performing certain tests to ensure that the data is not corrupted or lost during or after the process of replacement of disk.
For Disks using Raid 0:
A) Pre Disk Replacement Tasks:
Login to Access Node of Hadoop Cluster.
Ssh to corresponding Hadoop datanode/worker node for production/integration environment Where disk issue is rectified.
-
(optional: if Cobbler is Used)
-
Start Cobbler.
service cobblerd start
-
Netboot enables the server so it will rebuild on reboot.
- cobbler system edit --name=hostname --netboot-enable=true;cobbler sync
- cobbler system report --name=hostname | grep -i boot ( to check netboot status)
-
-
(optional: if Puppet is Used) Remove puppet cert
puppet cert clean hostname
-
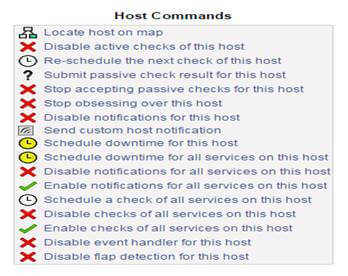
(optional: if Nagios is Used) Disable Nagios alerts for host.
http://nagios-hostname/nagios/ (where “Nagios-hostname” is the hostname where Nagios is installed)
Search for hostname on left side
Click on hostname to go to host page
-
Disable all notifications:
-
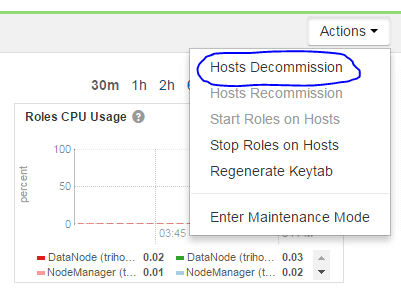
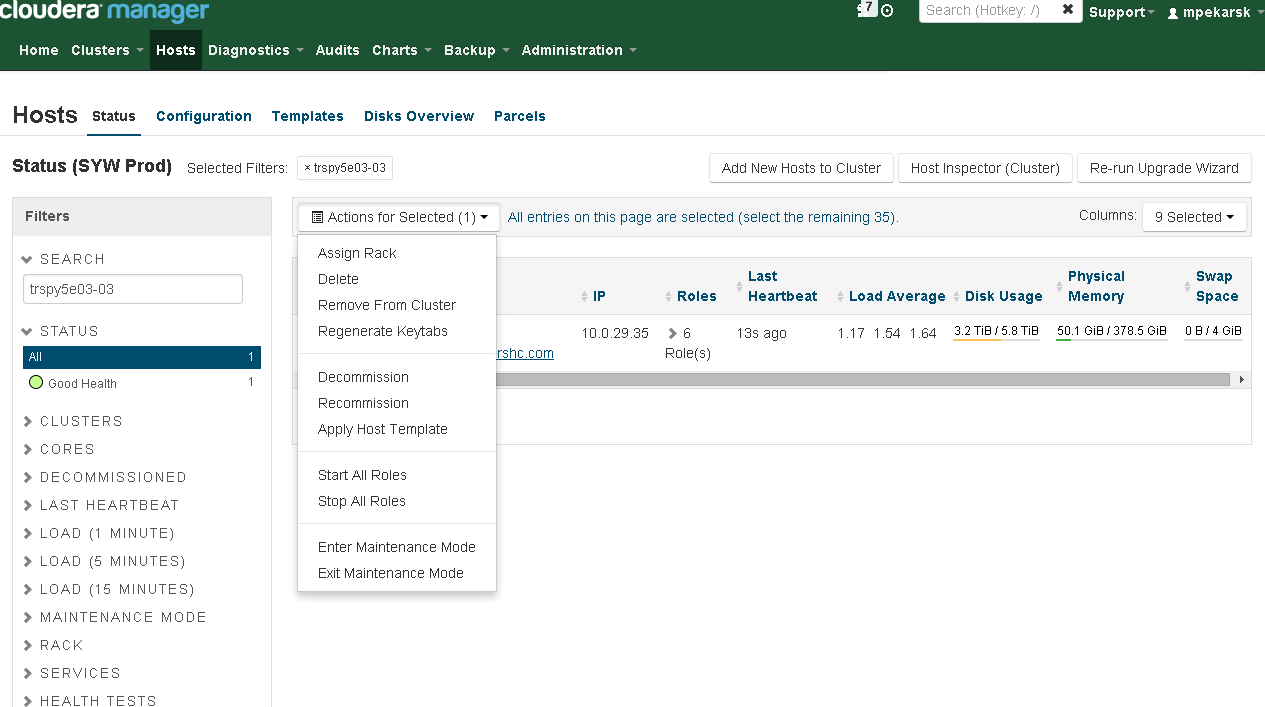
If the host is not already decommissioned in Cloudera Manager (or any other Monitoring tool), decommission it now. Decommission can take 10-20 minutes depending on how many blocks need to be replicated from this host to others in the cluster.
-
On specific host page: Actions → Hosts Decommission
-
B) Actual Disk Replacement:
- Power down server.
- Swap bad disk with good disk.
- Power on server and ensure PXE boot so it boots from the network and rebuilds.
C) Post Disk Replacement Tasks:
-
(optional: if cobbler is installed) Check rebuild status.
- Cobbler status | grep hostname (rebuilding will take 20-25 Min)
-
Ssh to host once rebuild is complete.
- df command to verify file systems.
- Check /var/log/messages for any errors related to recently replaced disk. Could be a sign of other issues besides a bad disk.
-
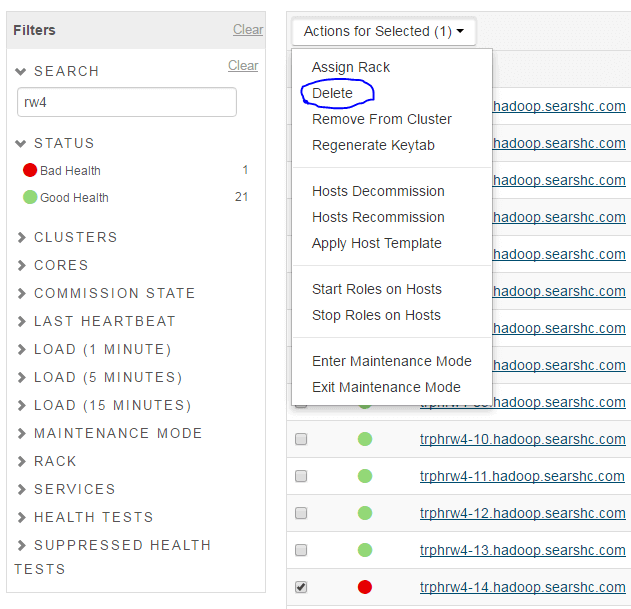
Delete host from the cluster in CM (or any other Monitoring tool),
-
Will need to decommission the host if not already done.
-
Hosts Page →Search for hostname →Check the box →Actions for Selected →Delete
-
-
Add the host back to the cluster
- Login into worker node
-
(Optional: depends on cluster proxy settings)
vi /etc/yum.conf
Add below line and save
proxy=http://hostname:port
-
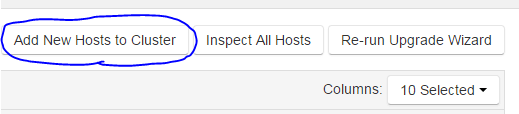
Add the host back to the cluster
-
Hosts Page → Add New Hosts to Cluster
-
Search for the host after clicking continue.
-
Select the host after it is found and click continue. (A sample host shown below)

-
Select “Matched release for this Cloudera Manager Server” and continue.
-
Select both JDK and Unlimited Strength Encryption Policy Files and continue.

(Optional) Use the root password or get the private key from the host and continue.
Wait for installation to complete and continue.
Wait for parcels to be installed and continue.
Ensure no errors from the host inspector and continue.
-
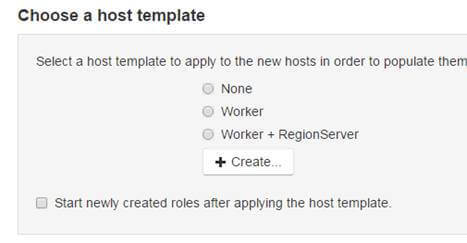
Select the host template that corresponds to the rest of the server in the rack and do not start the new roles. (Don’t check on “Start newly………….”)
-
-
On the newly added host page change the rack name to match the rest of the servers in the same rack.

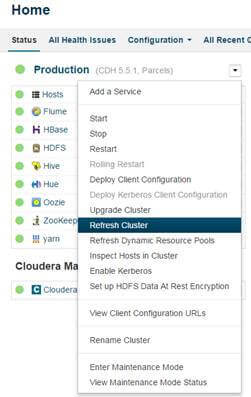
- Deploy configurations for HDFS, Hive, and Yarn
- Once deployments are complete, REFRESH cluster and not RESTART.
-
(Optional: if Nagios is Used)
Enable notifications for hosts in Nagios using the same process/steps mentioned above used to disable.
-
Start all roles on the host.
For Disks using Raid 1/10:
1) Pre Disk Replacement Tasks:
-
Put the server to Maintenance Mode via CM or any other monitoring tool. Hosts menu Search for host that having issue, mark this host, click on Action for
Selected => Enter Maintenance Mode, then => Stop All Roles
- Login to the server. For Illustration purpose let’s assume we have Issue on:- /dev/sdd, pdisk 0:1:4, /data/3
-
Determine which vdisk corresponds to pdisk that is being replaced. Change vdisk number until the output of the below command shows the correct pdisk.
a. omreport storage pdisk controller=0 vdisk=0
-
Unmount data directory
a. umount /data/3
-
Blink the lights on the outside of the disk, so Linux team can easily identify correct disk.
a. omconfig storage pdisk action=blink controller=0 pdisk=0:1:4
2) Actual Disk Replacement Tasks:
- Disks are in the raid controller, therefore hot swap, no need to power down the server.
- Swap bad disk with good disk.
3) Post Disk Replacement Tasks:
-
Make sure the new disk is good.
omreport storage pdisk controller=0 pdisk=0:1:4
-
Create new RAID-0 VDISK
omconfig storage controller controller=0 action=discardpreservedcache force=enabled
omconfig storage controller controller=0 action=createvdisk raid=r0 size=max pdisk=0:1:4
-
Create a new primary partition that uses all of the available space on the disk. Delete any currently existing partitions.
- fdisk /dev/sdd
-
Create a new filesystem on the disk and disable checking of the filesystem.
- mkfs.ext4 -F /dev/sdd1 -E lazy_itable_init
- tune2fs -c 0 -i 0 -m 1 /dev/sdd1
-
Get UUID for the new disk.
-
blkid|grep sdd/dev/sdd1: UUID="c776a82e-d575-4621-81c9-0ac46e8a1f6e" TYPE="ext4"
-
-
Edit fstab and replace old UUID with new UUID from above command.
- vim /etc/fstab
-
Re-mount disk.
- mount /dev/sdd1 /data/3
-
Go back to Cloudera URL (or any other monitoring tool)
Start all Roles for this server
Exit Maintenance Mode