

Agenda: In this tutorial, we will
- Create a new project folder
- Initialize that to a GIT repository using Visual Studio Code integrated GIT feature
- Create a new Console application in that repository
- Track the changes made to the repository and make Commits using Visual Studio Code GIT GUI and Integrated terminal, both
- Do more operations on repository to explore other features of GIT in Visual Studio Code
Version controlling is the most required feature that a asp.net web development team needs while working in an enterprise environment. GIT is the most popular version controlling system which is open source, free to use, works on Linux based shell scripting, and easy to integrate with any type of IDEs.
Microsoft has done a great job by integrated all the features of GIT within Visual Studio Code editor. This is the reason that Visual Studio code is dominant code editor tool in Software Development Solutions.
It is very important for any developer while working in an enterprise environment. Visit us to avail our expert services.
Pre-requisite
Visual Studio Code must be installed on your system. If not, please navigate to https://code.visualstudio.com and download the installer for it and install it in your system.
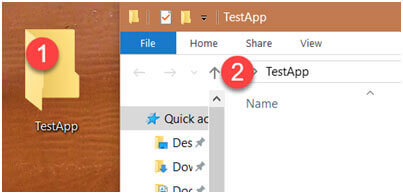
Step 1: Create a new Folder on your local system. I am creating it on Desktop. This folder will act as our repository.
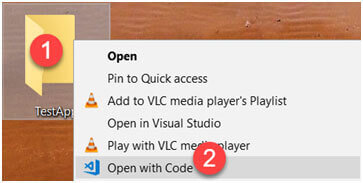
Step 2: Right click on the folder and select ‘Open with Code’. This will open the folder in Visual Studio Code editor.
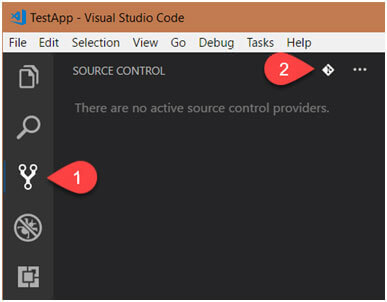
Step 3: You will see 5 big icons on the left panel; the third one is for GIT. Click on that and you will see a small icon of GIT, if you hover over that icon, it will show a tooltip ‘Initialize Repository’. This is used to initialize a folder or a project folder to be a GIT repository so that GIT can track the changes in it.
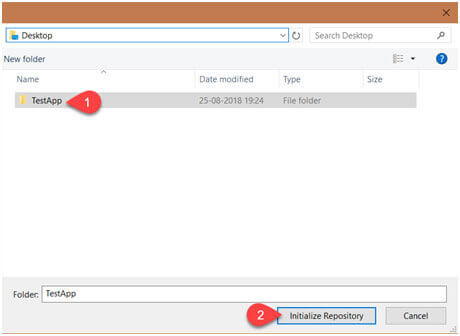
Step 4: Once you click on the icon, it will ask you to select the folder that you want to initialize to GIT repository. So, select the folder that we created on Desktop.
Step 5: Now, our new folder is GIT enabled repository. Open Integrated terminal, by following the below shown steps or use shortcut “Ctrl + ~ “.

Step 6: Create a new console application by using Asp.net web development core template. Use the below highlighted command and it will create some new files in the repository.

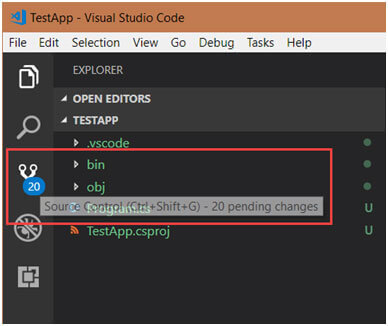
You can notice, on the left side, the third large icon shows ‘7’ as badge count; this means that there are 7 changes to the repository that Visual Studio code has tracked.

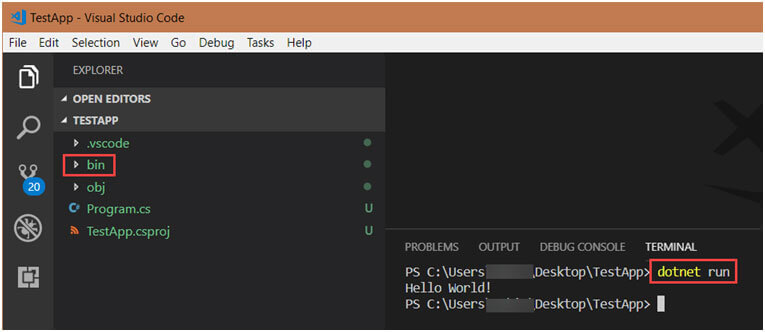
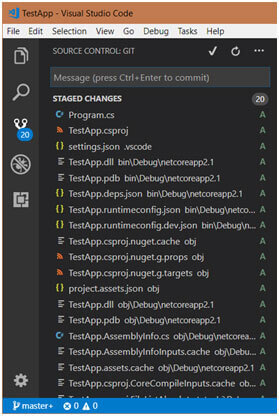
Step 7: Compile and run the application using below highlighted command in screenshot. This will make sure that our project template is working fine. Also, this will create a bin folder in the repository and increase the count of tracked changes to ‘20’.
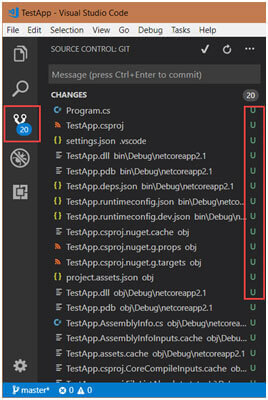
Step 8: Click on the GIT icon on left panel, and you will see the list of files that are added, modified.
‘U’ in front of most files states that these are untracked files. We need to Stage them before committing.
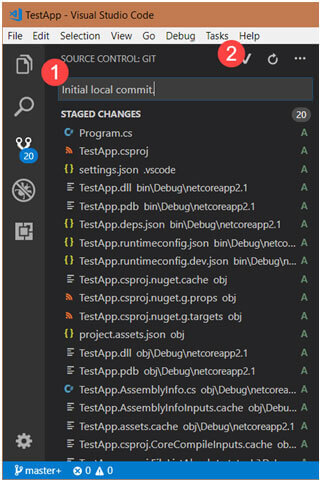
Step 9: Stage the untracked files in repository and you will notice, the ‘U’ status changes to ‘A’ meaning ‘Added’ as tracked files now.
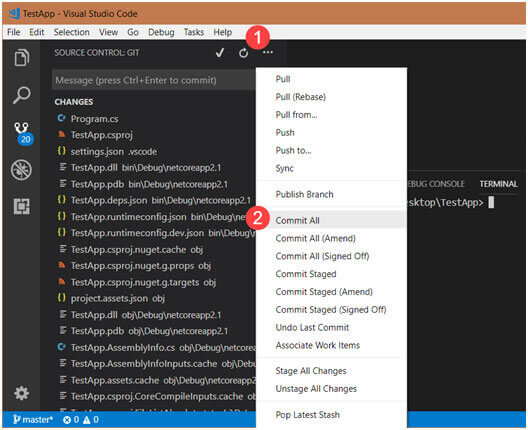
You can directly click on ‘Commit All’ option or you can click on ‘Stage All Changes’.
Step 10: Add a comment in message box and click on commit button, this will commit our changes to repository. GIT will create a HASH Id as well for that commit so that it is track able.
And that’s it. We are done with committing our changes to GIT repository using GIT GUI in Visual Studio Code.
Now we will perform same operations and some other operations through integrated terminal command line tool within Visual Studio Code. We will be using some git commands to perform these operations.
Step 11: Verifying the commits done so far can be achieved with the command mentioned in the screenshot below.

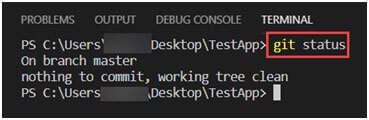
Step 12: To check whether there are any pending changes that are not committed yet, we can use ‘git status’ command.
Step 13: Now, let’s make some changes to Program.cs, and see whether GIT track changes to that file and shows in GIT panel in Visual Studio code.
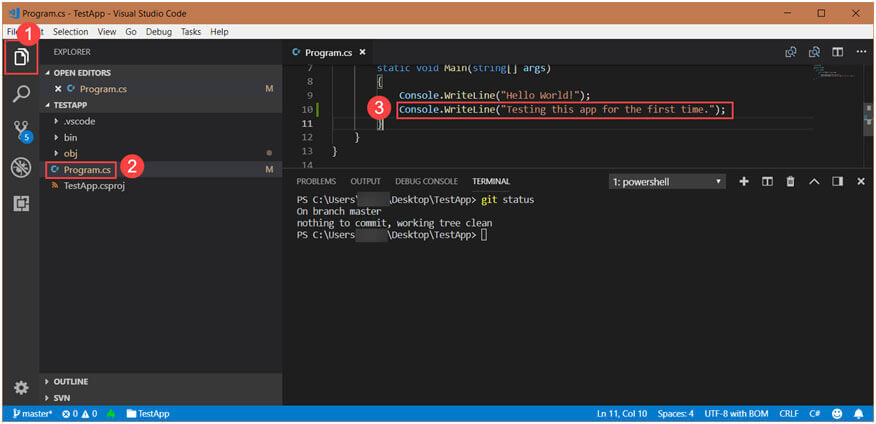
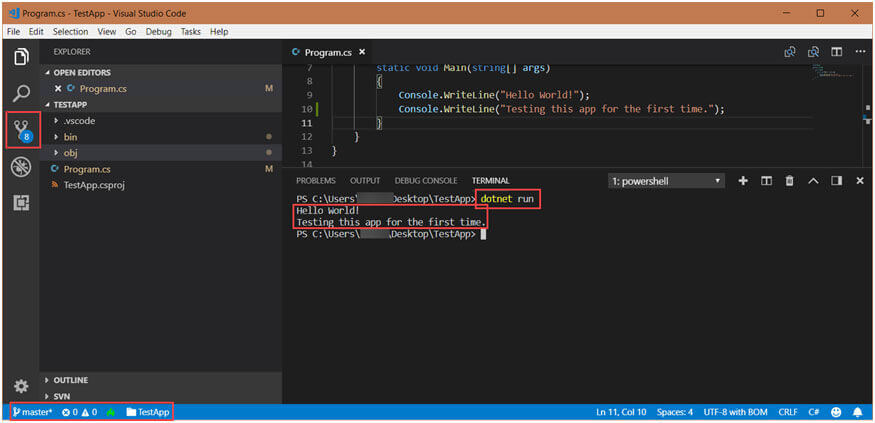
If you notice in above screenshot, the third icon on left panel, indicate 8 count as the number of changes which were tracked.
Step 14: Since these changes are not staged at all, so they will be treated as untracked. So, we write ‘git add .’ command and it will add these changes to tracked changes and you are then ready for making another commit.
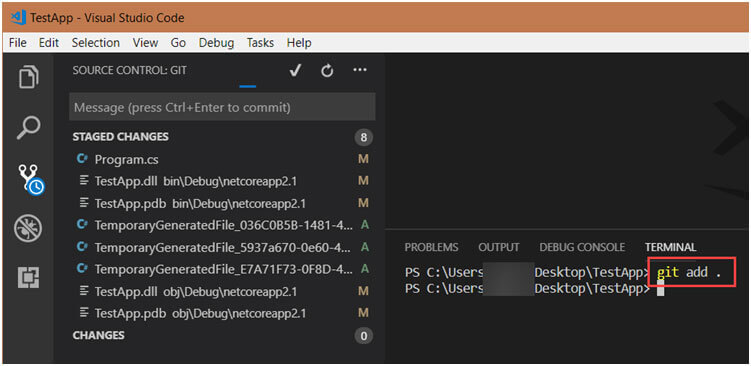
In above screenshot, ‘M’ in front of some file names indicates that these files already exist in project but are modified. Some are with ‘A’ flag, meaning these are newly added files.
Step 15: Commit changes using git command.

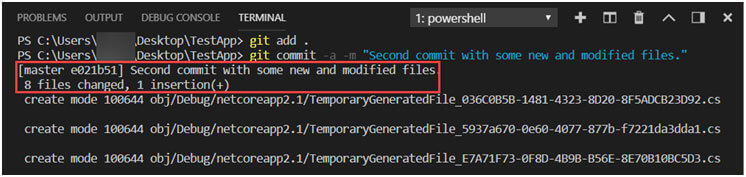
You can see that git committed the changes to repository and shows status that 8 files changed and 1 insertion.
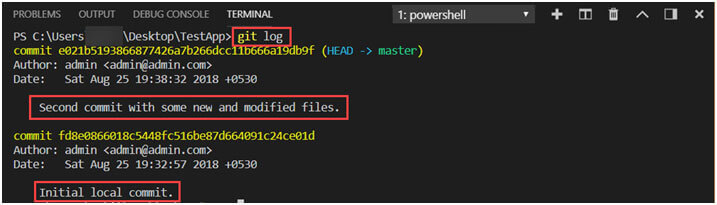
Step 16: If you remember, from above, we made 2 commits in total. So, if we hit ‘git log’ command, it should show both commits.
Conclusion
So, finally we concluded that GIT is the easiest to use version controlling system and Visual studio code has made it easier for us to maintain our asp.net web development projects. Hope you enjoyed.