

Agenda: In this article, we will learn about microservice architecture, and we will also create a fundamental .net core microservice API with some sample data.
Pre-requisite:
- Visual Studio 2019
- Basic knowledge of HTTP endpoints and CRUD Operations
Microservice is an API architecture that allows us to write a WebAPI with isolated logic. A microservice has its own database, which is independent of itself. These services act as a single endpoint that serves an only purpose.
For example,
You have an application that needs some additional logic for six months. After six months, you don’t need that logic to be applied to your asp.net web development application anymore.
If you are using a single service that contains all the business logic, you need to modify the code of that service or add a new code there. After six months, you again need to, maybe, comment out that code or deactivate it using a flag.
But if you are using a microservice architecture, you don’t need to modify any existing code. Instead, for that unique logic, you would create a new microservice and expose its endpoint to your application for use. Later on, after six months, if you want to disable, you can directly disable the microservice without modifying any code.
So microservices are isolated in logic and independently made, which is easy to maintain and use.
Learn the nuances of .net core to get the fundamental edge. We have the information to renew your skills. Call us for the demo.
We will now create a .NET Core microservice. Let’s start.
-
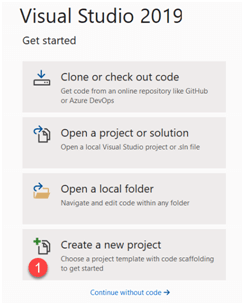
Step 1: Create a new project in visual studio 2019.
-
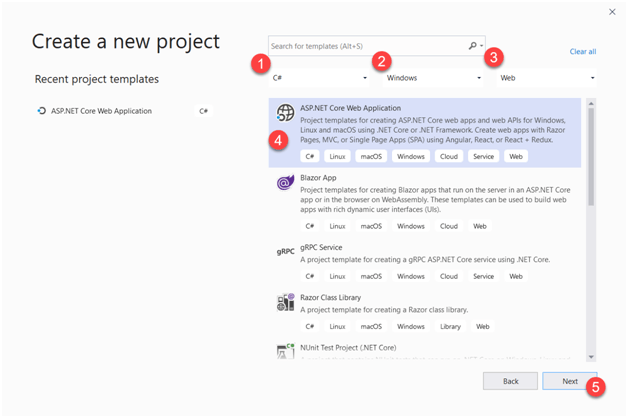
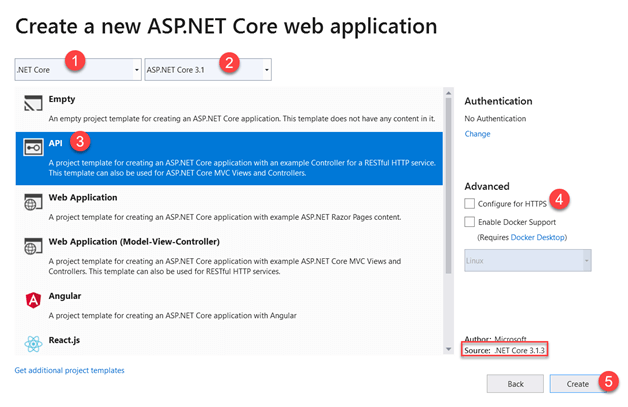
Step 2: Select the ASP.NET Core template from the list of templates available. This will not appear for those who didn’t install .net core SDK while installing Visual Studio 2019. So, please be sure that .net core is in your system.
-
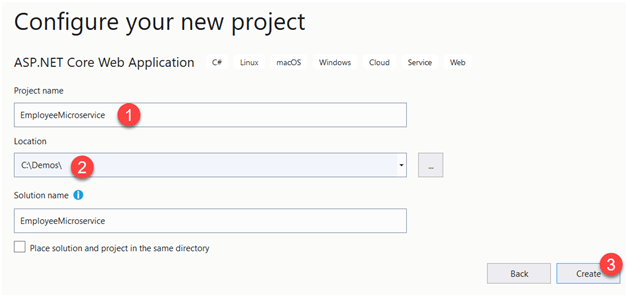
Step 3: Type the name of the project and select the location where you want to create this project on your local hard drive.
-
Step 4: Select the WebAPI template from the list. Microservices are always api project. Make sure that you disable Https and Select the right version of .net core.
-
Step 5: Once the project is created, make sure it is running by pressing F5. You will see a weather forecast API which comes out of the box from the .net core web API template.
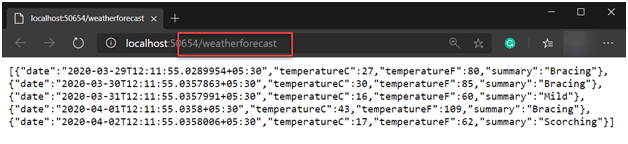
The above output should come if you are using the current version of .net core.
-
Step 6: Since the name of the microservice is “EmployeeMicroservice”, it should perform all the operations related to the employee. For example, Returning the list of employees, create an employee, delete an employee, and update the details of an existing employee.
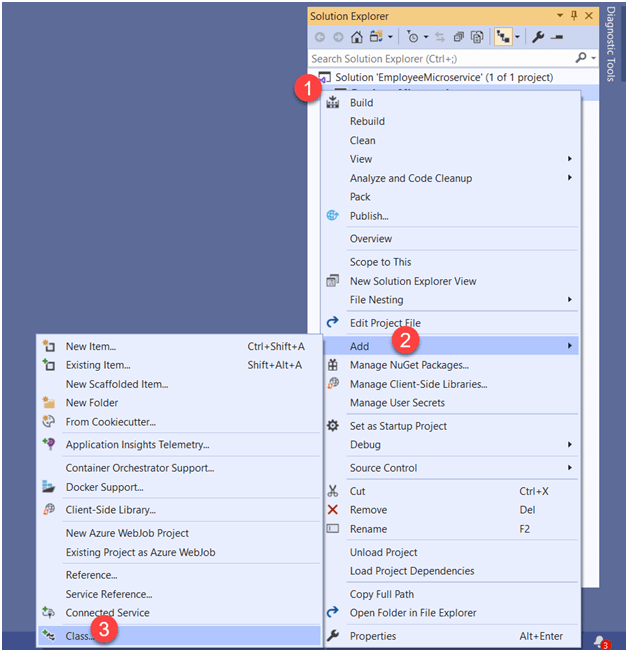
So, at the very first, we need to create a class that represents an employee property.
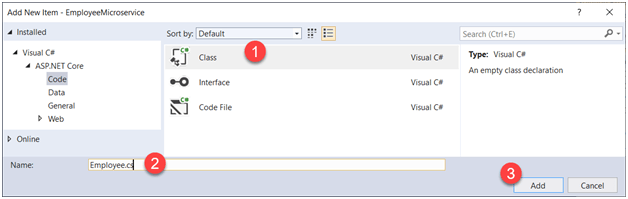
Right-click on the project name and add a new class with the name Employee.cs.
-
Step 7: Since it is a microservice which is specific to the employee, we should have only one controller that performs all the operations. Delete the Weather forecast controller and Weatherforecast.cs file.
-
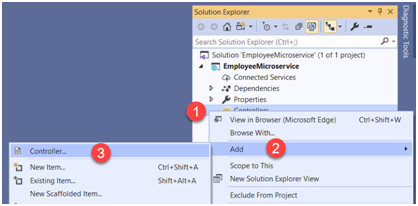
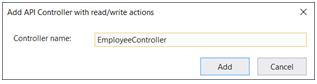
Step 8: Right-click on the controller folder, and add a new controller with the name EmployeeController.cs.

Once you click the Controller option, it will ask you to choose a controller template. Since we are creating an API, select API controller with Read and Write actions.
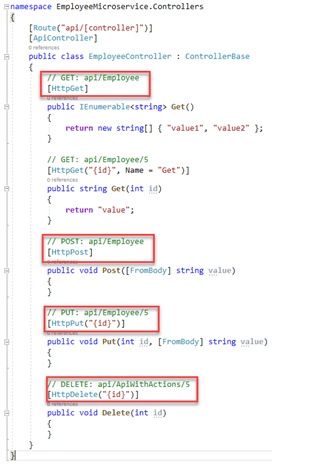
The reason behind selecting an API controller with read and write action is that it uses scaffolding to generate code for basic CRUD operations as shown below.
-
Step 9: Replace the first get method with the following code.
publicIEnumerable < Employee > Get() { List < Employee > employees = new List < Employee > (); var employee1 = new Employee { Id = 1, Name = "John", Gender = "Male", DateOfBirth = newDateTime(1970, 05, 25), Salary = 25000.36 }; var employee2 = new Employee { Id = 2, Name = "James", Gender = "Male", DateOfBirth = newDateTime(1970, 05, 30), Salary = 27000.98 }; employees.Add(employee1); employees.Add(employee2); return employees; } 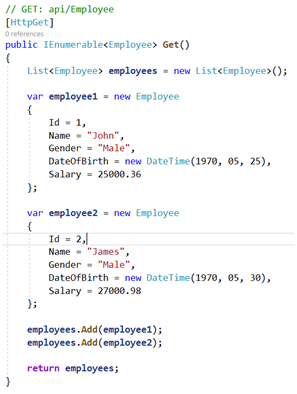
The above code is simple and straight forward. We created two employee objects and added those objects to the employee list and return it to the user.
So, when you hit the API endpoint, you should get these employee lists in the form of JSON.
-
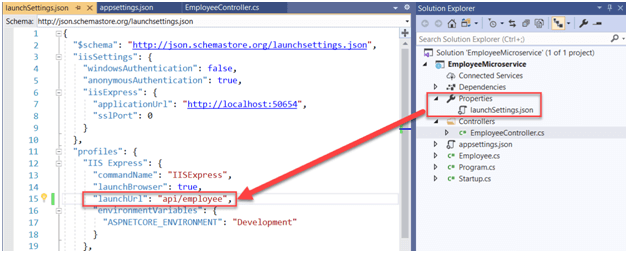
Step 10: When you create a web API project with .net core provided template, it creates weatherforecastcontroller and configure that endpoint by default. So, we will change the default endpoint to the employee controller.
Go to launchsettings.json file in the solution explorer and make the following change.
-
Step 11: Now save everything and hit F5. You should see the following with the list of employees.

That’s it. Our microservice for employee logic is ready.